Guide
- Installation
- Introduction
- Getting Started
- Declarative Rendering
- Basic Components
- Conditionals and Loops
- Composing with components
- Handling user input
- Animations
- Slots
- Component As Prop
- Device APIs
- React Native
- Ready for more?
- Vue Native Router
- Testing
- Community Libraries
- How does it work?
- How to contribute
- FAQ
Device APIs
Some of the functionalities that an app needs that depends on the hardware of the device such as accelerometer, location, camera, push notifications among many others may be accessed and used as shown in this documentation.
For non-crna projects created with vue-native, you may use packages such as react-native-sensors and link them to get started.
Accelerometer
With Expo, you need to import the Accelerometer module from expo-sensors.
Install the package using:npm i expo-sensors
and import it as follows:import { Accelerometer } from "expo-sensors";
Let’s initialize our accelerometerData and bind it to our template.
data() { |
<template> |
Use the Accelerometer and methods provided to listen to changes in the device’s accelerometer and store them in accelerometerData.
Accelerometer.addListener(accelerometerData => { |
You can even set the update interval of the accelerometer.
Accelerometer.setUpdateInterval(1000); |
Refer the expo documentation for more details.
Geolocation
npm i expo-location expo-permissions |
Accessing the device’s hardware to get to know it’s location can be acheived by using APIs provided by expo.
You must request permission to access the user’s location before attempting to get it. To do this, you will want to use the Permissions API. You can see this in practice in the following example.
If you deny the application permission to access location, it will continue to block. To overcome this on iOS, you can use the device’s Expo application setting to “allow while using” or you can delete and re-install Expo app.
<template> |
<script> |
<style> |
Camera
For vue-native projects created with CRNA, we will be using expo‘s camera component.
With use of Camera one can also take photos and record videos that are saved to the app’s cache. Morever, the component is also capable of detecting faces and bar codes appearing on the preview.
Requires Permissions.CAMERA. Video recording requires Permissions.AUDIO_RECORDING.
npm i expo-camera |
Basic Example
<template> |
<script> |
<style> |
Push Notifications
Push notifications at their core are simply a way of alerting users to information that they have opted-in to from apps and services. They also help the apps deliver timely and relevant information to users, and in doing so, staying top of users’ mind.
We will be looking into how we can send push notifications using expo since we are going to use vue-native projects created using crna.
In order to use vue-native projects created using react-native cli, libraries such as react-native-push-notification can be used.
There are three main steps to wiring up push notifications when using expo:
• Sending a user’s Expo Push Token to your server.
• Calling Expo’s Push API with the token when you want to send a notification.
• Responding to receiving and/or selecting the notification in your app (for example to jump to a particular screen that the notification refers to).
To make this more simpler to get started, we won’t be using a server to store the token and send notifications to the device, rather we will be using the Expo push notification tool to test push notifications.
Register device with Expo and store the token.
In order to send a push notification to somebody, we need to know about their device. Let’s look at the function that is used to register the device.
registerForPushNotifications: async function() { |
We are logging our token so that we can use it in the Expo push notification tool to send the test notifications to device.
Call Expo’s Push API with the user’s token
Push notifications have to come from somewhere, and that somewhere is your server, but for our learning here, let’s use the Expo push notification tool and add the required fields.
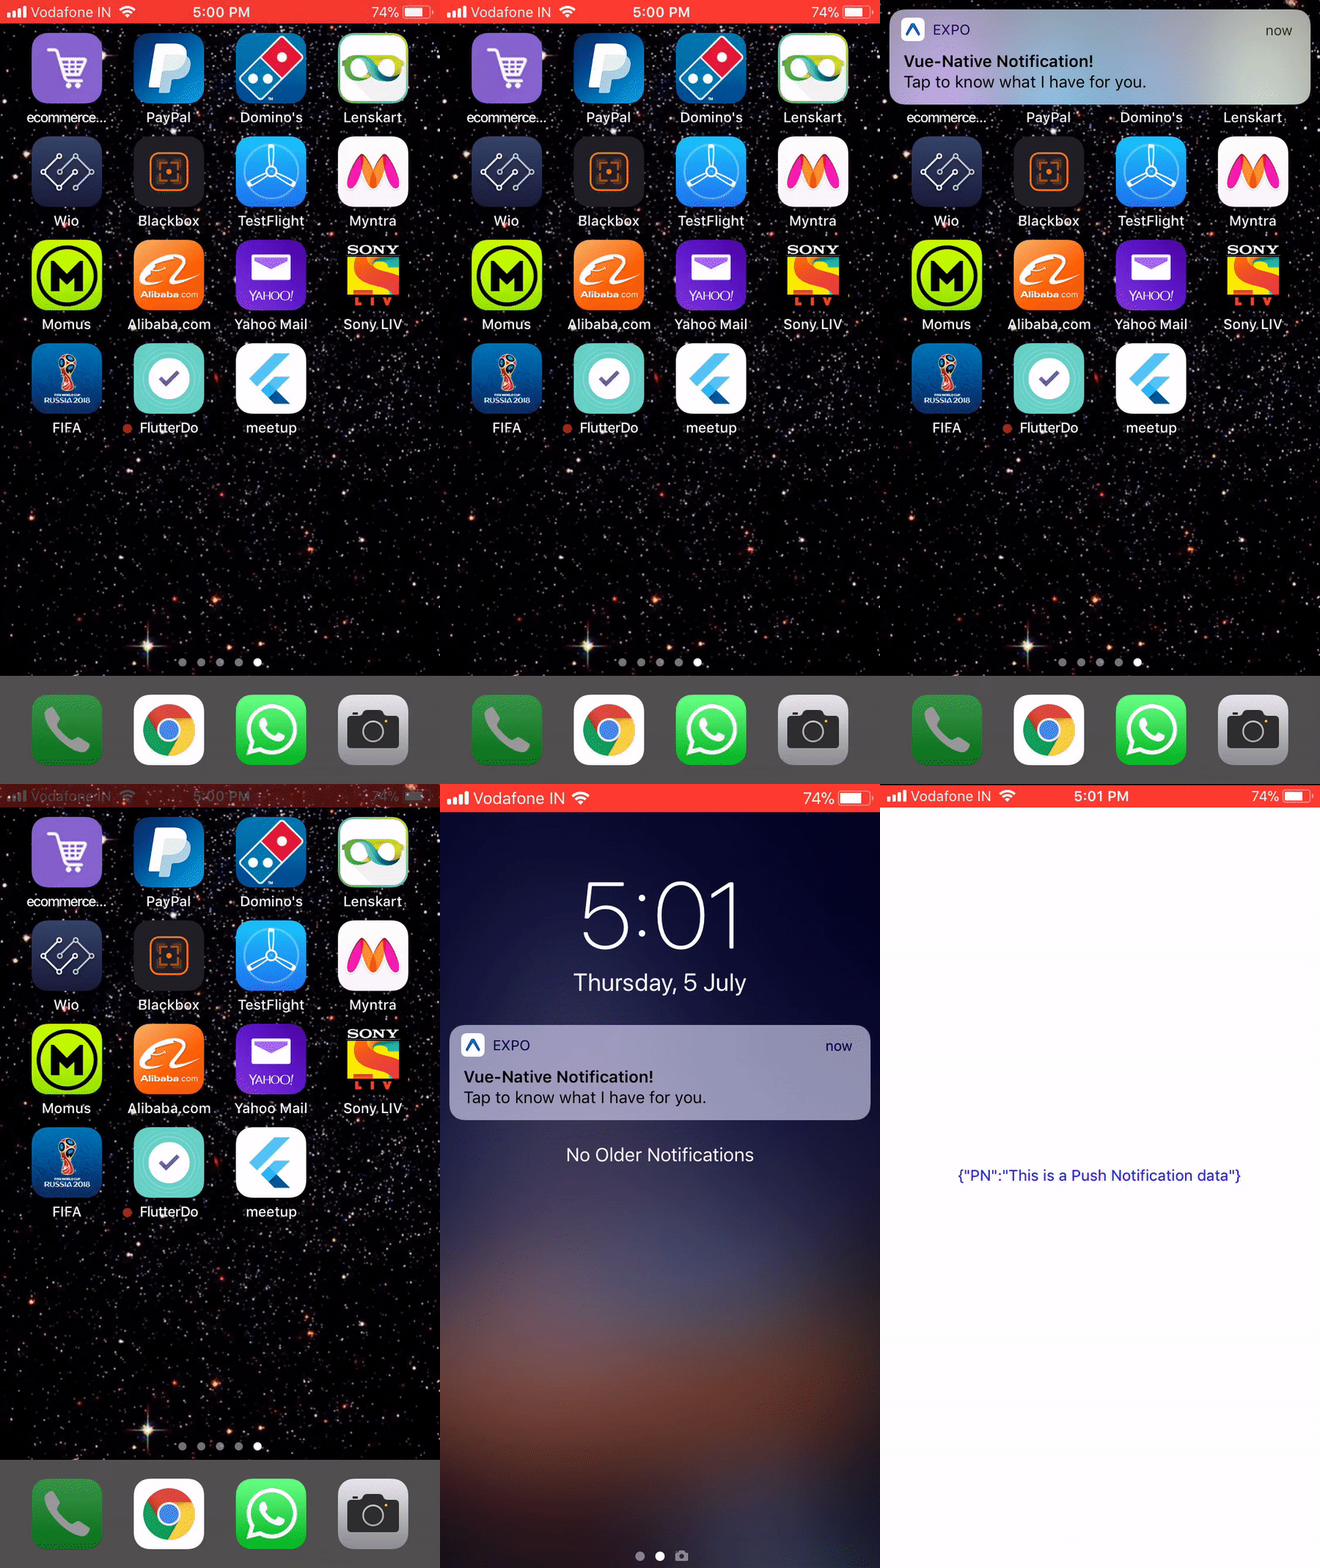
Once sent, the notification appears as shown below.

Handle receiving and/or selecting the notification
For Android, this step is entirely optional – if your notifications are purely informational and you have no desire to handle them when they are received or selected, you’re already done.
Handling push notifications is quite straightforward with Expo, all you need to do is add a listener to the Notifications object.
Let’s bind a variable from the data section that we can change when user clicks on the notification.
<template> |
data() { |
Also a function that handles the notification and also attach a listener so this function is called when the notification is to be handled.
created: function() { |


